Hexo Build

Hexo Build

该文档用以,记录自己(外行)利用Hexo建立Blog的过程,将原本用Gitbook构建的笔记转移到Hexo中,同时购买域名并部署其上。网页部署于Github Page。以Live my Live主题为例。

腾讯云和Github Page的操作和理解在现有的一些博客中过时了,或者说存在一些问题,后续会对此进行简单的讲解。同时大部分博客都是使用NexT主题进行配置,这里采用的是Live My Life主题,该博文介绍自己的粗浅理解,也为自己后续的工作进行一定的参考。

还存在一些没有解决的问题:

  • 对主题切换和主题配置和全局配置的的深入理解(Live my Life主题覆盖了很多默认配置)
  • 前端代码的理解,自定义Layout,超链接,图标等
  • 深入理解插件的应用和自定义
  • 推送网站到baidu和google(Option)(没有计划)

之后有时间的话可以去研究一下:

关键词:Hexo_Livemylive、Github Page、腾讯云(Domain、DNS、SSL)


PicBed Setting for note and blog

PicBed Setting for note and blog

@Aiken 2020 first write,2021 modify

Mainly using picgo-core(command line) to setting picbed,and we can update the setting method

Github

基本部署

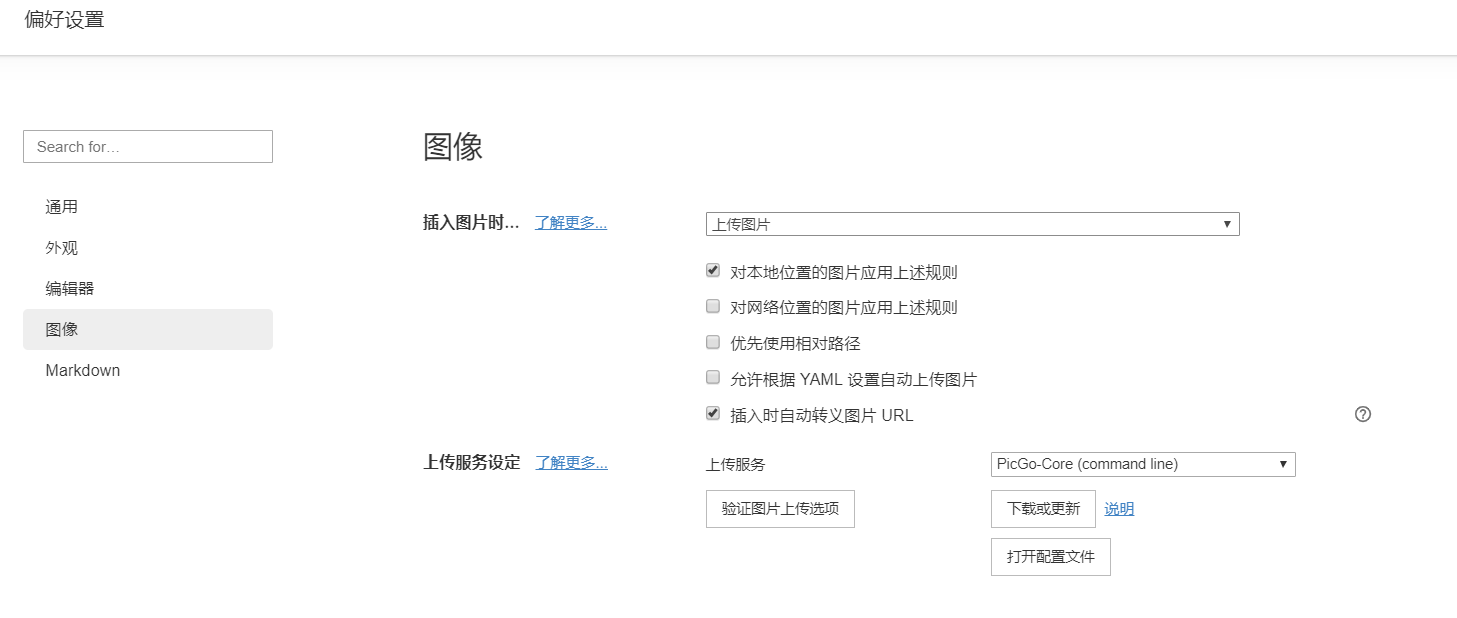
  1. 在偏好设置中的图像,进行如下设置👇: 下载或更新PicGo-Cord(command line)

image-20200512160643588

  1. 接着去Github中建立一个Repo:UserName/RepoName,用以存放图片(Public),简单的用readme初始建立即可。

  2. 在Github的setting - developer setting-personal access tokens中新建token,指定简单的repo权限,并记录个人的token(只显示一次)
    Attention: 忘记记录的话,在token中也是通过update token(好像是这个名,获取新的值的)

  3. 用Typora打开配置文件设置,或者使用命令行进行配置

1
2
3
4
5
6
7
8
9
10
11
12
13
14
{
"picBed": {
"github": {
"repo": "UserName/RepoName",
"token": "your github token here",
"path": "img/",
"customUrl": "https://raw.githubusercontent.com/UserName/RepoName/master",
"branch": "master"
},
"current": "github",
"uploader": "github"
},
"picgoPlugins": {}
}