PicBed Setting for note and blog
@Aiken 2020 first write,2021 modify
Mainly using picgo-core(command line) to setting picbed,and we can update the setting method
Github
基本部署
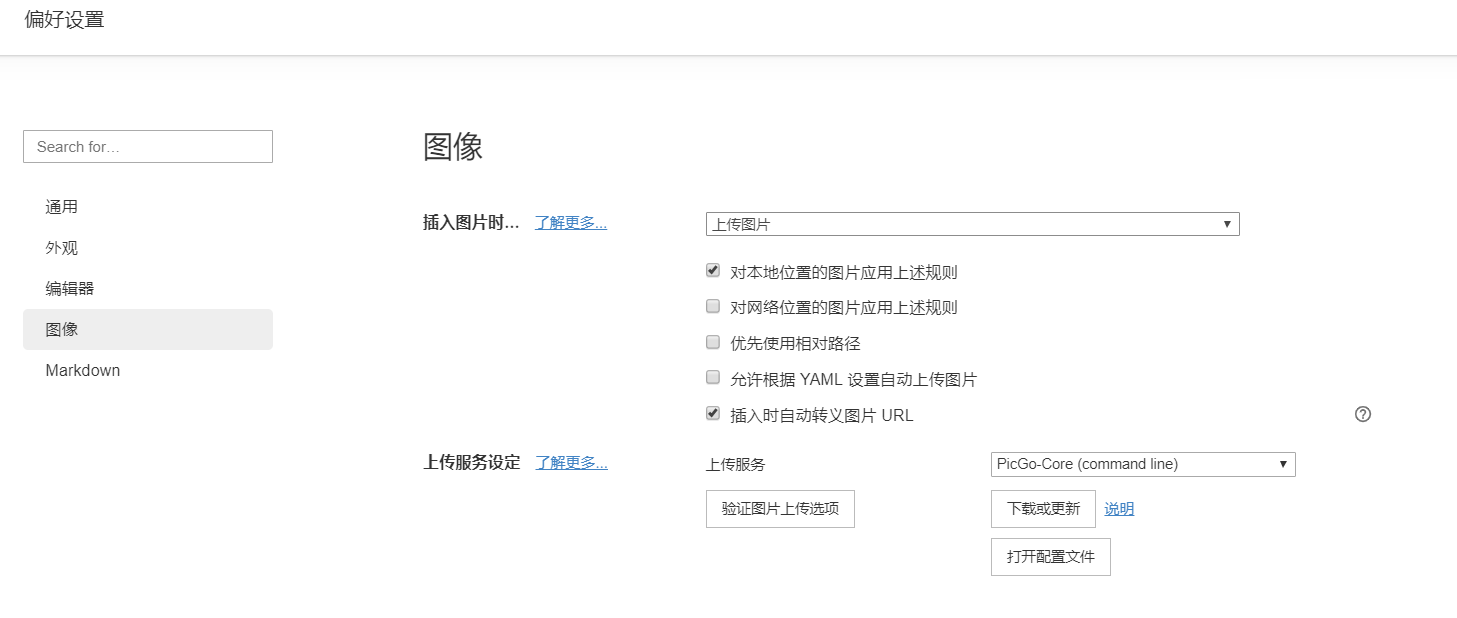
- 在偏好设置中的图像,进行如下设置👇: 下载或更新PicGo-Cord(command line)
接着去Github中建立一个Repo:UserName/RepoName,用以存放图片(Public),简单的用readme初始建立即可。
在Github的setting - developer setting-personal access tokens中新建token,指定简单的repo权限,并记录个人的token(只显示一次)
Attention: 忘记记录的话,在token中也是通过update token(好像是这个名,获取新的值的)用Typora打开配置文件设置,或者使用命令行进行配置
1 | |
- 点击验证图片上传选项,进行测试,成功即可
存在问题
用Github做图床的话,上传不是十分的稳定(可能需要依赖科学上网技术。请八仙过海,各显神通)。可以用其他的服务器作图床,大体过程应该也差不多,后续个人有更换的话在进行补充。
- 在其他的pc上可以使用相同的token进行复用,但是在进行测试的时候要记得将repo中的两张测试图片删除,不然可能会导致验证失败的问题。
PicGo With Obsidian etc.
这种方法可能是最稳健的泛化能力也最强,再很多编辑器类似的地方都能用,但是前提就是我们进行笔记撰写的时候要把picgo的客户端打开。
- 安装
picgo客户端,(在其中安装你对应图床的插件)
- 和上述描述的一样再gitee或者github中设置相应的图床token等,并在软件中填写对应的token
- picgo设置中,打开server即可
- 再Obsidian中安装插件
image auto upload plugin并在其中设置本地ip:port即可
COS in tencent-cloud
相关网站:Tencent-Cloud-Cos
参考资料:Create-Tencent-Cloud-Cos, Setting-Your-PicGoApp
创建存储桶
Create Store-Bucket(Private write Public read) ->
Create A sub-User(which only got access for the cos R/W) ->
QcloudCOSFullAccess, Pic Below to add the access
generate a private_token ->
token manage
cp SecretID,SecretKey,Main_Account_ID,name_of_bucket to PicGo
the area in the second figure


Picgo 设置
- 进入腾讯云的对象存储页面:
- 存储桶列表中可以看到存储桶名称,即Bucket
- 所属地域,也就是设定存储区域如:ap-guangzhou
- 右上角的用户信息中点击访问管理进入到用户界面
- 用户-> 子用户可以看到账号 ID:即Appid
- 点击子账户进入详情页->API 密钥
- SecretId
- SecretKey
- 设置完成即可。
Gitee(防盗链事件后抛弃)
因为gitee是国内的github,服务器比较稳定,所以我们也可以使用gitee作为我们更为稳定的图床;
两个链接合起来才是好用的,都有一些冗余:
gitee基本部署
安装Node,npm;
安装picgo-core的命令行命令:
1 | |
- 安装gitee的插件:
1 | |
配置Gitee Repo
初始化一个repo,保存URL中的User/repo,不要轻信标题,因为有昵称机制。
在个人资料中初始化个人的Token,勾选
projects选项即可;
设置配置文件
基于picgo的命令,会自动的更新Json文件,我们不许需要
1 | |
PicBed Setting for note and blog