Hexo Icarus 配置
本文的博客页面基于 Hexo)+Icarus 主题搭建,在使用过程中对该主题做了一些简单的配置,以适应自己的需求。这里介绍一下自己粗浅的方案。
十分推荐 Icarus 这个主题,功能支持十分全面而且作者的文档也较为详实,推荐大家去了解。
拓宽显示页面区域
include/style/base.styl 中定义了各种基本页面尺寸:
1 | |
可以在 include/style/responsive.styl 中定义 2 栏 3 栏情况下所使用的宽度:
1 | |

本文的博客页面基于 Hexo)+Icarus 主题搭建,在使用过程中对该主题做了一些简单的配置,以适应自己的需求。这里介绍一下自己粗浅的方案。
十分推荐 Icarus 这个主题,功能支持十分全面而且作者的文档也较为详实,推荐大家去了解。
include/style/base.styl 中定义了各种基本页面尺寸:
1 | |
可以在 include/style/responsive.styl 中定义 2 栏 3 栏情况下所使用的宽度:
1 | |

Hexo和Gitee一致,都是由Markdown文件为基础,构建的博客,编写Markdown本身无需多言,由于Hexo并非笔者的首选笔记管理方式,故而再其他地方构建和编写文件是常态,该Blog主要是利用其他工具来方便Hexo博文的编写(Header)
默认的是 hexo new [layout] title 可简写为 hexo n [layout] title,其中布局应该是在博客目录中定义,该命令也局限于博客的对应目录。
post(默认)、draft、page
除了默认的方法,本篇将介绍Obsidian、VsCode-like、Vim自动添加Header的方式,用以方便随时随地的编写博文。
同时为了方便已有笔记迁移,本文也编写了Python脚本,CPY后为Target Dir的版本自动添加Header,但是其中对应的Catagories最好还是手动修改一下。
该文档主要目的是用于测试Latex语法对应前端的渲染能力,主要用于测试Hexo站点是否能正常渲染Latex。
Example1: 2 inline in one sentence.
When $a \ne 0$, there are two solutions to $(ax^2 + bx + c = 0)$ and they are
Example2: Matrix Example
Example3: the Conditional Formula
Example4: Sprcial Symboy
该文档用以,记录自己(外行)利用Hexo建立Blog的过程,将原本用Gitbook构建的笔记转移到Hexo中,同时购买域名并部署其上。网页部署于Github Page。以Live my Live主题为例。
腾讯云和Github Page的操作和理解在现有的一些博客中过时了,或者说存在一些问题,后续会对此进行简单的讲解。同时大部分博客都是使用NexT主题进行配置,这里采用的是Live My Life主题,该博文介绍自己的粗浅理解,也为自己后续的工作进行一定的参考。
还存在一些没有解决的问题:
之后有时间的话可以去研究一下:
关键词:Hexo_Livemylive、Github Page、腾讯云(Domain、DNS、SSL)

@Aiken 2020 first write,2021 modify
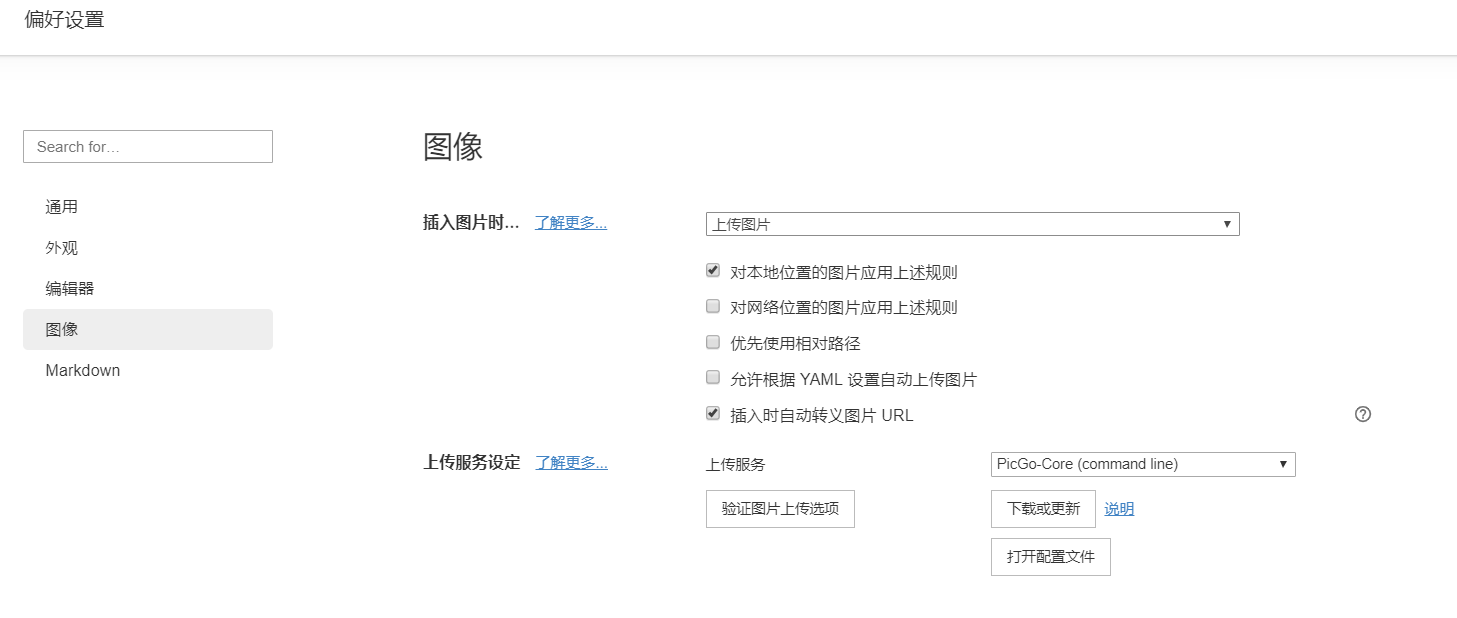
Mainly using picgo-core(command line) to setting picbed,and we can update the setting method
接着去Github中建立一个Repo:UserName/RepoName,用以存放图片(Public),简单的用readme初始建立即可。
在Github的setting - developer setting-personal access tokens中新建token,指定简单的repo权限,并记录个人的token(只显示一次)
Attention: 忘记记录的话,在token中也是通过update token(好像是这个名,获取新的值的)
用Typora打开配置文件设置,或者使用命令行进行配置
1 | |

Gitbook命令行工具,基于Markdown编写文档,后续基于Github发布该Blog
笔记的构建流程:
安装Gitbook之前我们需要安装node.js和npm的依赖,使用npm安装gitbook
首先安装Install Nodejs,Npm
Windows:Node.js (nodejs.org)
Linux:
1 | |
然后安装gitbook
1 | |
检查Gitbook版本
1 | |